Monitoring your unit tests without lifting a finger
I love unit testing. First of all, I think it is a good idea to test separate units of the code, but after doing so for some time, I’ve come to realize that unit tests are great for managing the software development cycle too. It all boils down to the idea that you should write tests before you write your code.
Now, this is something that I and others apparently struggle a lot with. How do you write a test for some code that doesn’t even exist yet? Even worse, how do you write a test for a piece of software that you’re not yet sure how will be used?
In computational physics, this problem arises often because we are writing code at the same time as we are trying to understand the physics, mathematics and algorithms at hand. And this is a good thing. You might want to think that one should structure all code before it is written, but this is generally a bad approach in computational physics. Especially if you’re working on something new. The reason is that you will often understand the problem and algorithms better while developing, rather than just reading about them and trying to analyze them blindly.
Keeping the tests and code healthy
But enough with the talk, let’s just assume that you are convinced that you should (or have to) implement some unit tests. At one point you are likely to be in a position where you find it tiresome to have to go into that folder where the tests are defined and run them manually. This is where Jenkins comes in to play.
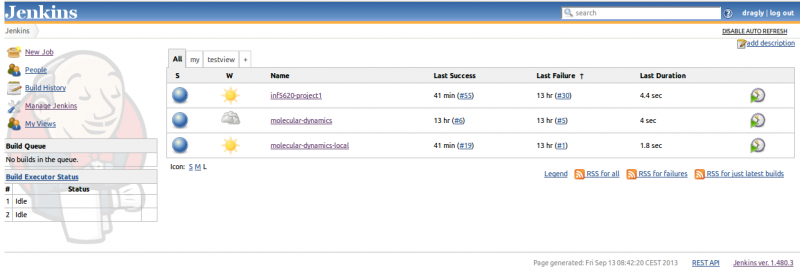
Jenkins is a build bot that is designed to fetch your code from wherever, download, build and run the commands you need to test your code. It also provides a very nice web interface that will allow you to keep track of which builds are working and which are not.
After running tests manually for way too long, this is exactly what I needed. I have already written a post about how you can launch your tests after building your project in Qt Creator, but this has the disadvantage that your code will be compiled twice whenever you build it, and you’ll have to wait for the tests to finish before actually seeing your code run. With Jenkins, everything happens in the background. And Jenkins can be configured to run builds periodically, whenever your source code changes or is pushed to Git.
Setting up Jenkins with access to Git and local folders on Ubuntu
Installing Jenkins on Ubuntu is a piece of cake:
sudo apt-get install jenkins
However, you might want Jenkins to be able to pull your source code and build it from a remote Git repository, or even more obvious, access your projects on your local drive, which it is not able to do by default(!).
Installing the Git plugin
After installing Jenkins, you should immediately be able to access it through this page:
To install the Git plugin, go to Manage Jenkins → Manage plugins → Available and search for “git”. You should install the plugin named Jenkins GIT plugin. If you click this link, you should see the same page as you do if you click the link in the list.
Note that on Ubuntu 13.10 you will also have to install the Mailer plugin. This is a dependency of the Git plugin, but it is currently not listed, so you will have to install it manually for now.
Optional: Allowing Jenkins access to your private Github repository
This step is optional. If you only want to use Jenkins for public repositories, you may skip this step.
Jenkins needs its own SSH key to access private Github repositories. If you’re not familiar with SSH keys and Github, this is a good time to read a bit about it.
To generate this key, we’ll log in to the jenkins user in your Ubuntu terminal:
sudo su jenkins
Then run
ssh-keygen
and go through the steps to generate your key. Then print your key to screen so you may copy and paste it to Github:
cat /var/lib/jenkins/.ssh/id_rsa.pub
Copy and paste the key to Github. Then, by still being logged in as jenkins, run the following command to verify Github as a proper SSH host:
ssh git@github.com
You should receive a prompt like this:
PTY allocation request failed on channel 0
Hi dragly! You've successfully authenticated, but GitHub does not provide shell access.
Connection to github.com closed.
Now log out of jenkins by clicking CTRL+D.
That’s it! Jenkins now should have access both to public and private repositories.
Optional: Allowing Jenkins access to your files
This step is optional. If you only want to use Jenkins for Git projects, you may skip this step.
By default, and this is for security reasons, Jenkins doesn’t have access to your files on your computer. So if you want to launch a set of unit tests in your home folder, you will need to give Jenkins access to these. The easiest way to do this is by adding the jenkins user to your group. Just replace your_user_name below:
usermod -G your_user_name jenkins
Jenkins will now be able to access your files.
Optional: Adding some extra security by setting up a firewall
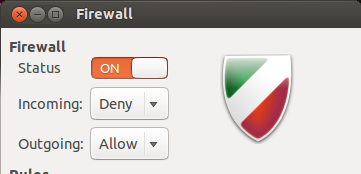
Jenkins uses port 8080 on your computer and by default allows anyone to access its services through this port. While you may mess around with Jenkins’ settings to set up user authentication, I found it better just to enable a firewall in Ubuntu and restrict inbound access on all ports (except the ones I use for other things).
Download and install Firewall Configuration from Ubuntu Software Center. And turn it on like this:
Now your Jenkins bot won’t allow anyone else access to run jobs on your machine.
Setting up your first project
Click Jenkins → New job and give it a name of your choice. Select Build a free-style software project as your setting and click OK.
In the next window, select Git as the Source Code Management option and enter your repository URL with http as the access method. If it is a private repository, follow the steps above to give Jenkins access to it, and use SSH as your access method.
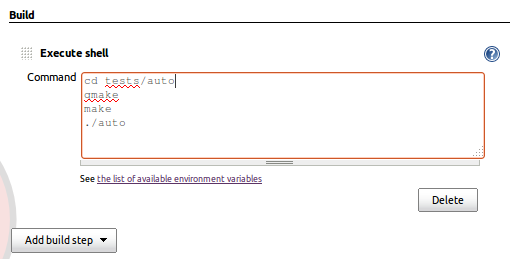
Further down, add an Execute shell build step:
This allows you to type in whatever commands are needed to run before the build may be tested. In my case, it would be to do something like this:
After doing so, click Apply and test your build by clicking Build now.
Checking the output
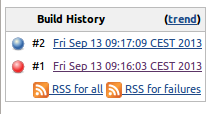
What Jenkins does now is to clone your repository into a temporary folder and execute the commands given in the Execute shell text box. You may check the result by looking at the Build History on the left hand side of the screen. Blue means unstable (crashed) build, red means stable build. Hover the pointer over a build and click Console output to see the exact output of the build. This is very useful if the build should fail and you want to know why.
If all goes well, you may explore the options to build whenever your source code changes or periodically, by looking at the Build triggers.
There are also plenty of other features in Jenkins, but I’ll leave it up to you to explore them all. The last thing you should do before you stop playing around is to add Jenkins as your browser’s start up page and always keep it visible on a screen so that you at any given time know how your builds perform.


